
In I/O 2021, Google’s biggest developer event of the year, the company demonstrated the upcoming Android 12 operating system, among other things. In addition, it marks the biggest change in user interface since Android Lollipop 5.0. Most of you will only be able to test the new interface in September or October. To give you a head start, we’ve compiled a way through which you can go ahead and Install Stock Android 12 on any Realme smartphone right now, and this is accomplished by using a GSI also known as Generic System Image.
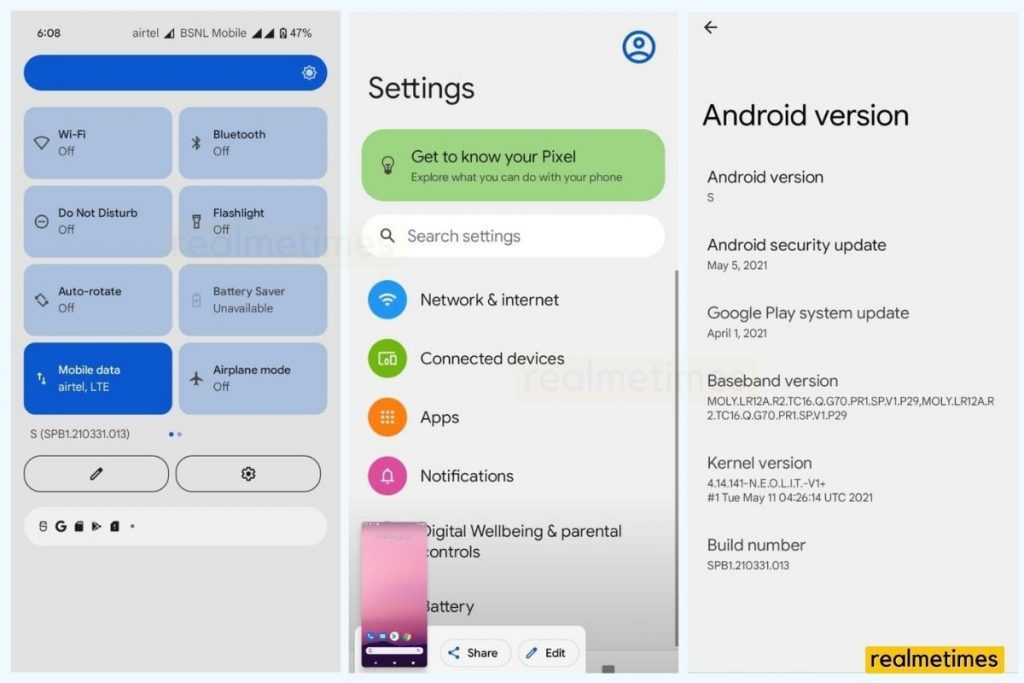
Image (GSI) of Android 12 Beta 1 for Pixel devices was made available for download earlier. Now the masses can download GSI packages for ARM 64, ARM 64+GMS, x86_64, and x86+GMS. Ensure you understand how this software works and what can happen in the event of a misstep before you make any download/load attempts. We’ve tried and tested the Android 12 Beta 1 GSI on our Realme C3, and it has worked almost flawlessly with certain bugs, and hence it is not recommended that you install this on your primary smartphone.
How to Install Android 12 GSI on Realme Smartphones

This post will focus on installing GSI for Android 12 on Realme smartphones, however, there’s another method that involves installing Android 12 via DSU. We expect that you’ve unlocked the bootloader and have enabled USB debugging enabled (check out how you can enable USB Debugging here).
Download Android 12 Beta 1 GSI File
You can go ahead and download the Android 12 Beta 1 GSI file from the link mentioned below.
Download Link 2
Thanks to Nippon for the GSI port
Install Android 12 Beta GSI on Realme Smartphones
The method varies based on what version of Android you’re phone was running on at the time of launch. Make sure you have complete knowledge before proceeding further.
1] For Phones Launched running Android 10 and above
- Start by connecting your smartphone with your PC using a USB cable.
- Next, paste the vbmeta.img (you can find the device ozip file from Realme’s Software Update Page) in to the ADB folder.
- Now, extract the GSI zip file and paste the system.img in the ADB folder.
- Next, open a Command Prompt or Powershell window in the same ADB Folder.
- Type in the following commands one at a time.
adb reboot bootloader
fastboot devices
fastboot reboot fastboot
fastboot –disable-verification flash vbmeta vbmeta.img
fastboot erase system
fastboot flash system system.img
fastboot -w
fastboot reboot bootloader
fastboot erase userdata
fastboot reboot
With this done, you’ll find your device up and running on Android 12 with the GSI.
2] For Phones Launched running Android 9 or below
Before beginning with this process, extract the GSI zip file and copy the system.img file onto an SD card.
- Start by flashing any Custom Recovery on your device.
- Next, boot into the Custom Recovery mode.
- Head over to Wipe -> Advanced Wipe -> and choose Data, Dalvik, System, Cache and then tap on Wipe.
- Next, Go to the Install menu -> Select the system.img file -> and flash in the System Partition.
- Now, Format Data by heading over to the Wipe Menu, and reboot your system.
With that done, your phone will now be running on Stock Android 12 ROM.
Also Read: How to Restore/Reinstall Deleted System apps on Realme smartphones
How to Return Back to Stock Realme UI ROM

- Boot your device into the Fastboot Recovery Mode and open a Command Prompt Window on your computer.
- Now, type in: fastboot erase system and press Enter.
- Now, flash the Stock Recovery by typing in fastboot flash recovery recovery.img (from your device ozip)
- Once flashed, boot into the Stock Recovery and flash the latest .ozip file by Selecting Language -> choose Install from SD card and selecting the ozip file.
With this, you’ll now be returned to your Stock Realme UI ROM, but all your data will be lost.
That said, wasn’t that an easy process? Do let us know by dropping a comment down below.